
How to Prepare Your Home for Custom Closet Installation
Preparing for a custom closet installation starts with knowing what needs to happen before the installation team arrives. An approved design is an important milestone, but the room may still need clearing, wall repairs, or coordination with other contractors. Without a plan, you could find yourself searching for tomorrow's clothes while trying to work out who should remove an old shelf.
To prepare for custom closet installation, confirm the final design, agree on who handles removal and repairs, and check whether flooring or electrical work needs to happen first. Empty the closet, arrange temporary clothing storage, and clear the agreed access route. Confirm arrival details and any building requirements with the installation team.
If you have already reviewed the custom closet design and installation process, use this guide to manage the practical handoff from approved design to installation day.

1. Confirm the design and preparation responsibilities
Before preparing the room, check the approved design and confirm that any outstanding changes have been resolved. Make sure the planned layout reflects the agreed storage needs, including hanging sections, shelves, drawers, and accessories.
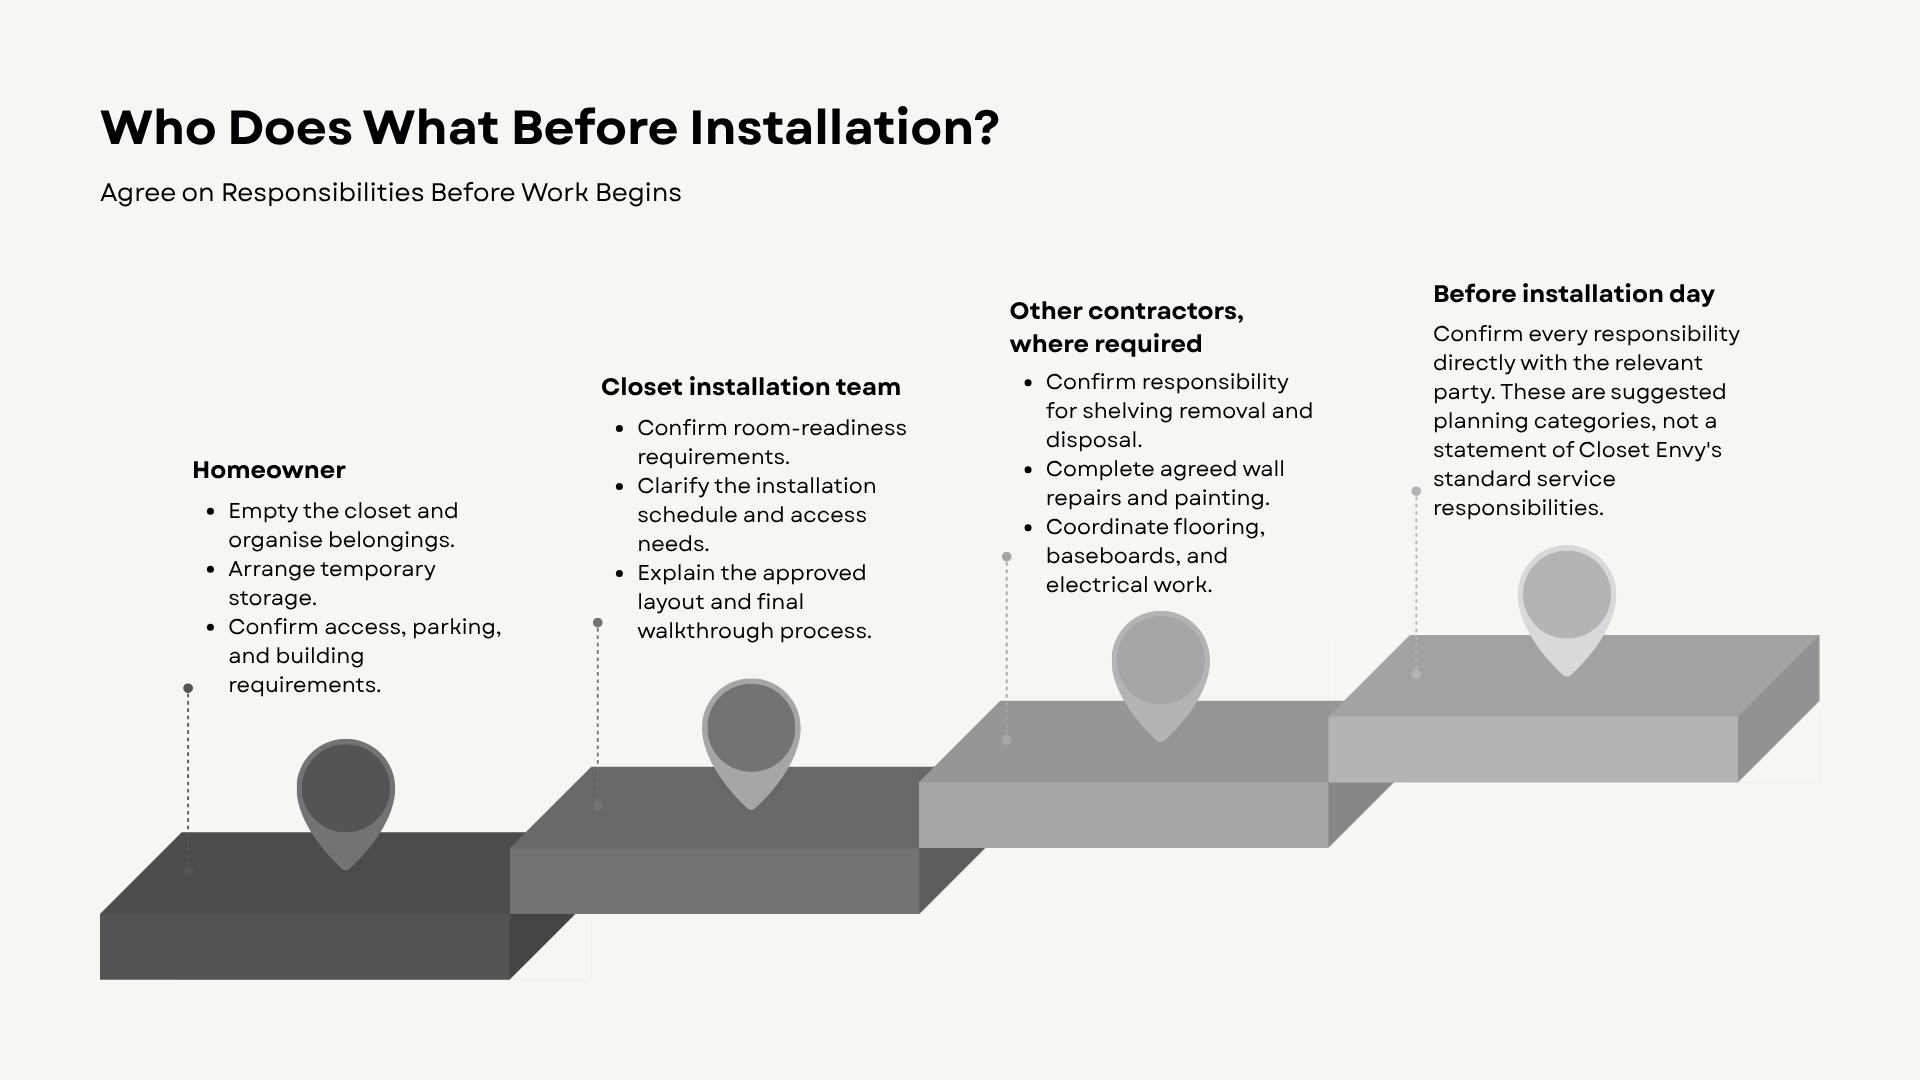
Create a written checklist that identifies who is responsible for each preparation task. Do not assume that the installer will automatically handle every part of the work.
Keep the answers in one place, along with the installation date, contact details, and any outstanding decisions. Written confirmation reduces the risk of duplicated work or an unfinished preparation task delaying the next stage.
2. Empty the closet and set up temporary storage
An empty closet gives the installation team access to the room and helps prevent belongings from interfering with the work. Remove clothing, shoes, accessories, and other stored items before installation, unless the project team has agreed on a different arrangement.
Start by sorting belongings into practical groups:
Daily essentials: Keep work clothes, school items, frequently worn shoes, and everyday accessories easy to reach.
Occasional items: Pack seasonal clothing, formal outfits, and rarely used accessories in labeled containers.
Valuables and fragile belongings: Store jewelry, watches, and delicate items somewhere secure and away from the work area.
Set up a temporary clothing station in a bedroom or another suitable space. A portable clothes rack, a clear section of wardrobe, and labeled boxes can help keep essentials accessible while the closet is unavailable.
Avoid placing temporary storage in hallways or near the installation route. If furniture or heavy storage units need to be moved, ask for help rather than attempting to lift them alone. Check the closet, drawers, and upper shelves for overlooked items before considering the room ready.
3. Coordinate shelving removal and wall preparation
Before removing existing shelves or storage units, confirm who will do the work and when it should happen. Shelving removal should be scheduled around the approved design and the installation team's requirements, rather than treated as an automatic first step.
Some existing systems may be attached to walls or supported by hardware that needs careful removal. Ask whether the project team wants the old closet cleared before a particular date, and confirm who is responsible for disposing of the materials.
Next, discuss closet wall preparation. Removing shelves can leave holes, damaged paint, or uneven surfaces that need attention before the new system is installed. Confirm whether repairs and painting are necessary, who will complete them, and whether the wall needs to be inspected before work proceeds.
Follow the paint or coating manufacturer's instructions for drying and curing. These are not always the same, and the required time can vary by product and conditions. Ask the installation team when the surface will be ready rather than relying on a universal waiting period.
Do not start repairs until responsibilities and requirements are clear. This helps avoid unnecessary work or changes to surfaces that the new layout may cover.
4. Check flooring and other work before installation
Flooring, baseboards, lighting, and electrical work can affect installation planning. Confirm how each planned improvement relates to the new closet system before scheduling another contractor. The correct order depends on the room, materials, and approved design.
Ask the installation team how the cabinetry will meet the existing or planned flooring. If you are replacing carpet, tile, or hardwood, confirm whether that work needs to be completed before installation. Also check whether baseboards must be removed, replaced, or adjusted.
Lighting and outlets deserve the same attention. If the design includes integrated lighting or other electrical features, confirm the requirements with the project team and a qualified electrical contractor where needed. Do not attempt electrical alterations yourself.
For more detail, review the guide to planning integrated closet lighting. Use it to identify questions to discuss before work begins, not as a substitute for project-specific instructions.
A short coordination check can help prevent contractors from working at cross-purposes. Ask each party what must be finished first, what needs to remain accessible, and who will confirm that the room is ready for the next stage.
5. Clear access and confirm building arrangements
Installation preparation includes the route materials and workers will use to reach the closet. Agree on access, parking, and arrival arrangements before installation day. This is particularly important if the closet is upstairs, the property has restricted access, or shared building spaces are involved.
Walk through the expected route from the entrance to the work area. Move loose belongings, shoes, small furniture, and other obstacles where practical. Confirm where the crew can park, which entrance to use, and whether someone needs to provide access.
If you live in a condominium, contact building management to check the rules that apply to your property. These may include permitted work hours, elevator reservations, contractor documentation, or protection requirements for shared areas. Requirements vary by building, so obtain confirmation rather than assuming a standard policy applies throughout Sarasota.
Keep children and pets away from the installation area and the route used to carry materials. Arrange supervision or a separate space where they can remain safely while work is underway.
Finally, confirm the arrival window, the best contact number, and any access instructions with the installation team. Resolve unanswered questions before the scheduled visit.
6. Complete a readiness check and final walkthrough
Before the crew arrives, use a custom closet installation checklist to confirm that the room and household are ready. A final check should identify unfinished tasks before they affect the scheduled work.
The approved design and any changes are confirmed.
The closet is empty and temporary storage is ready.
Removal, repairs, and painting are complete where required.
Flooring and electrical work have been coordinated.
The access route is clear and building arrangements are confirmed.
The installation team has the correct contact and arrival details.
If anything remains outstanding, contact the project team to establish whether it affects readiness. For Sarasota closet installation projects, the same principle applies: confirm the requirements for your specific home rather than relying on a generic preparation schedule.
After installation, walk through the completed space with the team. Check that doors and drawers operate as expected, compare the layout with the approved design, and ask about appropriate care and cleaning. Soft-close hardware, dovetail drawer boxes, and undermount glides are among the features available through Closet Envy, depending on the selected design. Raise any concerns and clarify outstanding items before signing off on the project.
Conclusion
Good closet installation preparation comes down to clear responsibilities, a ready room, and an agreed plan for access. Confirming these details early can reduce last-minute questions and help everyone understand what needs to happen before work begins.
If your design is approved but you still need to organise the practical details, Closet Envy can discuss the next steps for your project. Explore the company's custom closet design services or book a discovery call to discuss your requirements and prepare for installation.
